Join us on Discord

With your miniature assembled it is now time to prime it. Priming is a very important step of miniature painting as it will greatly increase the paints ability to adhere to the model and establishes a base color for your model making it easier to paint.
Step 1: Prepare Your Area and Test Your Primer
The primer you will want to use starting out will be matte black. Black primer gives a good base to work up from. There are many brands of primer, we recommend Army Painter Black Spray. Before using any primer on your model, you will want to do a few test sprays to see how much paint will come out and make sure that spray is consistent.
Setup your work area with old card board boxes or other scrap paper to ensure you don’t over spray onto the ground or the floor you are working on. Make sure to prime either outside or in a well-ventilated area such as a garage with the door open. Shake the can of primer well before use, a general rule of thumb is about one minute and then shake occasionally between sprays. Try and prime in low humidity conditions and in a place where it is not below freezing temperatures. The humidity and temperature effect how quickly the primer dries and how it’s finished surface looks.
Step 2: Priming your Miniature
When it comes to priming your model, here are some tips;
Hold the can about 12 inches or so from the model.
Spray off to the side of the model and then sweep across the model.
Use short quick sweeps

Once you have applied primer to one side of the model make sure to turn it and apply it to the other side. If you need to turn your model do so gently and try to touch the model only by its base or protruding pieces, you don’t want to leave fingerprints in wet paint!!
If you don’t get full coverage with the first few passes let the primer dry a little before applying more, this helps prevent paint building up, which can obscure detail. Continue turning the model and priming all sides until you are happy with the coverage. Make sure to check the underside looking for any missed spots. It helps to lay the miniature down but be careful not to lay it in wet paint. Don’t worry if you can’t get the primer into a tricky spot you can go over it with black paint if needed.

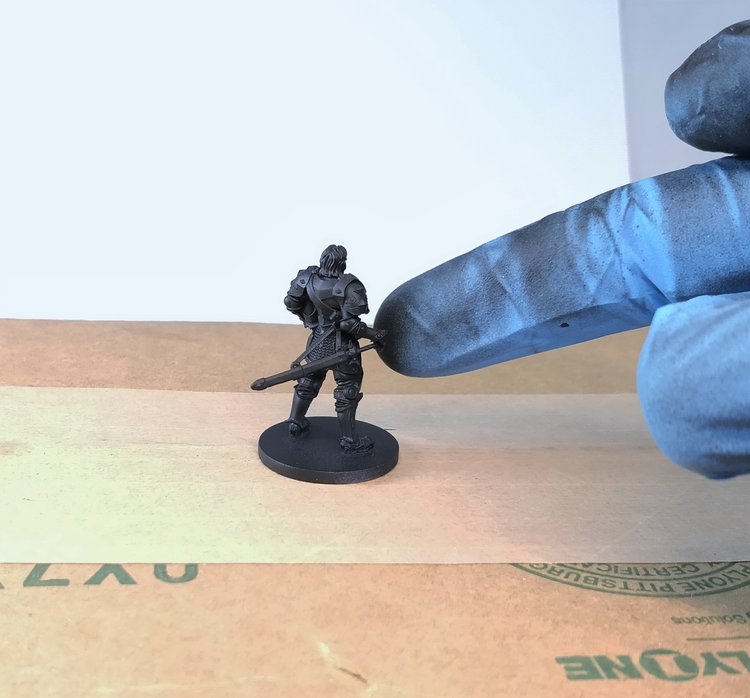
(Optional) Use a Holder for Your Miniature
If you use a holder for your miniature like the one pictured below, which was talked about in the Cleaning and Assembly Blog it can make priming much easier but can get messy, so we recommend wearing some gloves to keep your hands clean. It will make getting all angles of your miniature easier without the risk of rubbing paint off by laying the miniature and faster because you can turn the model much easier.

Note: Also, be warned that the force of the primer’s spray can cause the miniature to move or get blown over if it is made of a light weight material. Be careful about touching your mini in between sprays, use only gentle nudges or wait until the primer has a dried a little before turning the model.
With your Miniature primed allow it to dry and off for 15-30 minutes before attempting to work on it. Once dry you are ready to get painting. Having a nice smooth coat of primer makes the painting process much more enjoyable and will help you have an awesome looking finished Miniature to play with or display. In the next intro hobby blog, we will cover some painting tips and tricks to help you get the best results from your paints and brushes.